Create Store Locator With Content Block
Are you looking to expand your business? Do you want to make it easier for your customers to find your physical stores? A store locator is a must-have feature for any business with multiple locations. With a store locator, customers can easily search for nearby stores, see store hours, and get directions.
But how do you create a store locator? Thankfully, creating a store, dealer, hotel, restaurant locator is a lot easier than you might think, especially if you're using WordPress. In this article, we will guide you through the process of creating a store locator for your WordPress website, using the power of Google Maps and WordPress plugins.
Install Locatoraid Store Locator Plugin
Fortunately, WordPress comes with the option of automatic installation of plugins. With this feature, you can easily search for and install a store locator plugin right from your WordPress dashboard. No need to download or upload anything manually.
- Log in to your WordPress back end area as a user with administrative rights.
- Click Plugins, then Add New.
-
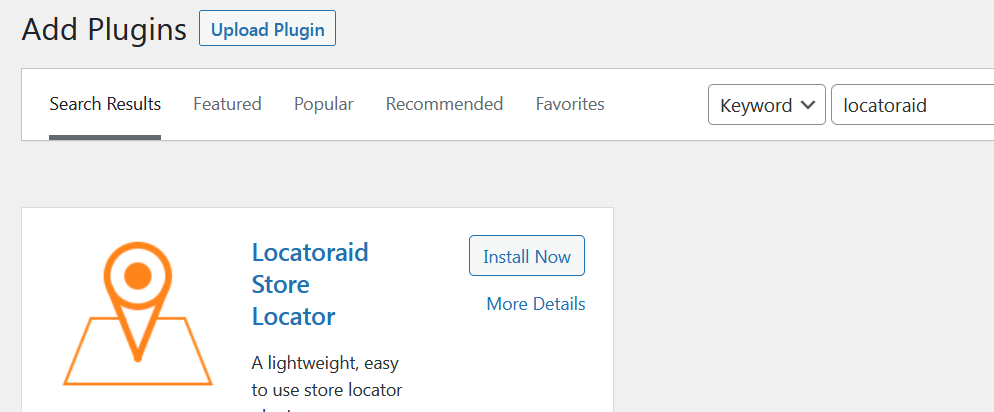
You will see the Search plugins..., type in locatoraid.

-
You will quickly see Locator Store Locator on top of your search results.
Manage Locations in Store Locator
Locatoraid store locator plugin comes with a number of ways to let you add and manage your records in the locations database. You can manually add and edit various location details, like store name, street address, city and zip code. You can automatically geocode (i.e. find the location coordinates) or manually enter the coordinates if needed. Also there is the CSV manager module that lets you quickly add, adjust or delete multiple locations in bulk. For all of these nice options please refer to other articles on our site. On this post we will focus on using content (aka Gutenberg) blocks feature of WordPress and Locatoraid to build a beautiful front end page of your store locator.
WordPress Content Blocks
A few years ago, to help streamline site creation and editing, WordPress introduced content blocks, together with the block editor. The WordPress block editor also called the block editor, WordPress editor or Gutenberg editor, and it has become the new way of publishing content in WordPress. These content blocks are individual, customizable content elements that you add to create your content layouts. Each item you add to your post or page is a block.
Out of the box all modern WordPress versions come with built-in blocks for all common content elements, such as blocks for paragraphs, images, headings, lists, videos, galleries, and more. But as usual with WordPress, much more power comes with the ability to add custom blocks through WordPress plugins.
Store Locator Content Block
The most recent version of Locatoraid store locator plugin comes with two content blocks. The first one is called Locatoraid Store Locator Map and it is used to display the main front end interface for your visitors and customers. Let's create a new WordPress page to display the store locator for your customers.
-
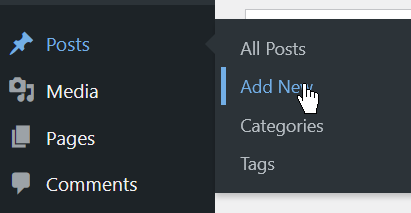
In your WordPress dashboard, click Posts, Add New.
-
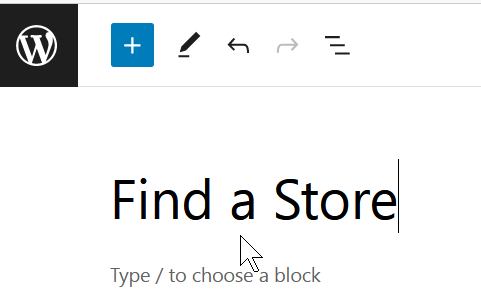
You will see the new page in the WordPress block editor which is perfect in its minimalist beauty. Let's name this new page as Find a Store.
-
Now we will go on to insert the store locator block. There are several ways to insert a new block.
- Click the big plus sign in the top menubar (Toggle Block Inserter).
- Follow the text suggestion and type / to choose a block.
- Click a smaller plus button next to the above mentioned text.
-
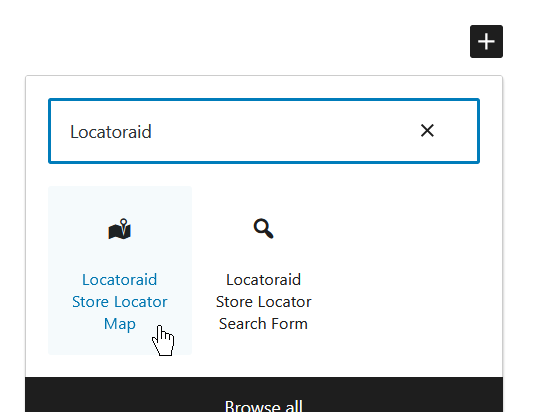
Either way will do, now you will see the Block Inserter. In the Search field, type in Locatoraid and you will instantly see the Locatoraid Store Locator Map content block.
-
Click it and the dealer locator content block will be instantly inserted into the content of the new page.
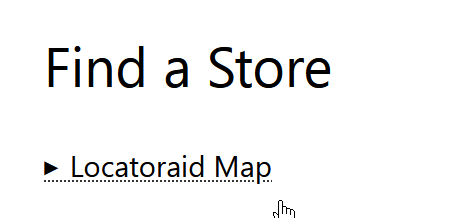
- Now click Publish button in the top right corner of the WordPress editor, and your store locator front end page is ready to go.
Customize Store Locator Block
Locatoraid store locator map content block also comes with a number of configurable options that can be used to adjust the front end view, like default search text, search radius, view layout, limit to a state or a country, and more.
To toggle the options form, simply click the underlined Locatoraid Map label in the block editor.
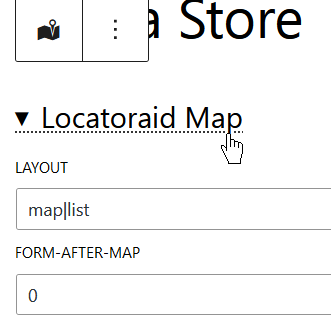
Below is the complete list the content block options.
layout
This option lets you define the layout of the map and the results list. The map denotes the store locator map display, and the list is for the location search result list. You can combine the map and the list parts together with either | or /. The | options means the map and the result list will be placed horizontally side by side, the / option will render them vertically stacked one after another.
Examples
-
map|list -
map|list -
list|map -
map/list -
map
form-after-map
By default, the search form comes above the map and the results list. If you set this option to 1, it'll place the search input field below the map.
start
This option defines the starting search string when a customer first sees the locator page. By default it's empty and the store locator will display all the locations. If you define a search string, we'll consider it as if the customer has just entered it. The store locator will find this address and will display nearest locations. f you set it to no, it will not display the map at all from start. Just the search form will be displayed for the customer, waiting for them to enter their search address.
Examples
-
Wilmington, DE -
no
map-start-address
If the start option is set to no, you can show a default map without search results yet, and this option defines the default center of the Google maps widget.
Examples
-
Helsinki, Finland
map-start-zoom
If the start option is set to no, you can show a default map without search results yet, and this option defines the default zoom level of the Google maps widget. You can choose values from 1 to 24.
Examples
-
10
map-max-zoom
This option lets you limit the closest zoom when the search results are displayed on the Google maps. By default, the store locator plugin automatically adjusts the map zoom level so that all the locations are displayed on the current map view. In some cases, these automatic zoom level may be too close to your taste, especially if there are just a few search results. The default value is 20. So if you think that your customers will be better off with a bit more zoomed out view, choose another value.
Examples
-
16
map-hide-loc-title
If this parameter is set to 1, it will not display the location title on mouse over the map marker.
Examples
-
1
limit
This option parameter defines the limits for the number of returned search results which are displayed on the map and in the results list. The default value is 2000. Setting this option is usually up to your preferences. You may want your customers to see the entire list of your stores or dealers, so you can set this option to a rather big value. Or you may prefer not to overwhelm your visitors with a choice and return perhaps just 3 matching stores closest to their search.
Examples
-
50
group
By default, the search results are displayed in a simple list, but you may want to group them, for example by city. Possible options include country, state, city, zip.
Examples
-
country -
state -
city -
zip
group-jump
If you enabled the group parameter, you can also add a drop down list to quickly jump to a group.
Examples
-
1
sort
By default, search results are sorted by distance to the address that was searched for. But you can change this behaviour and sort by location name. Possible options: name, name-reverse.
Examples
-
name -
name-reverse
map-style
This option lets you fill in the content of the style HTML attribute for the locator map container. You can enter any CSS text that you require.
Examples
-
height: 20em; width: 100%;
list-style
Since 3.0.7
The same as with the map-style option, this one lets you define the content of the style HTML attribute for the search results container. You can enter any CSS text that you require.
Examples
-
height: 20em; overflow-y: auto; border: red 2px solid;
search-bias-country
This option tells the Google Maps engine prefer matches in the specified country. This option works best when you have your locations in one single country, but for example, a search for Kings Road may return results in a different country. So you tell the maps to prefer results in your chosen country.
Examples
-
australia
radius
This option lets you define the radius steps where the store locator searches for your matching locations. You can provide several options separated by comma. If there are several options, then at first we search within the first option and together with the first radius result options we also give the More Results link to search further, within the next radius option. If we find no matches within the largest radius, it displays the No Results message. This value is in kilometers or miles that depends on your plugin settings.
Examples
-
20, 100, 500
radius-select
If this option is enabled, the store locator form will display a drop-down list to select a search radius option.
Examples
-
1
clustering
You can use this option to take advantage of the marker clusters feature of the Google Maps. It's especially useful when you need to display a large number of markers on a single map, and you don't want to overclutter it. With the number value of this option you can set the minimum quantity of locations on the map to activate clustering.
Examples
-
20
locate
It lets you make use of the visitor current location. It may also depend on the visitor browser privacy settings if they allow to determine their location.
Examples
- 1 - show Locate Me option
- auto - automatically start trying to determine the visitor current location
- 0 - disable
Default value is 1, i.e. it displays the button for the visitor to let us define their location, but it won't try to automatically detect the user current positio.
where-state
where-country
where-city
These options let you filter out the locations results list. You can allow multiple options, just separate them with |.
Examples
where-state
TX
where-state
TX|AZ|CO
where-country
Canada
where-product
This parameter lets you filter out the locations based on the products that they offer. You will need to enter the product ID which you can find out in Locatoraid, Products page in the Locatoraid admin area. To select multiple options, separate them with |.
Examples
2
Store Search Form Block
Together with the main store locator map display, Locatoraid provides a block to insert a simple search widget in any part of your website to search for your stores or locations.
This block acts just like the widget in previous version of WordPress that had no content blocks.
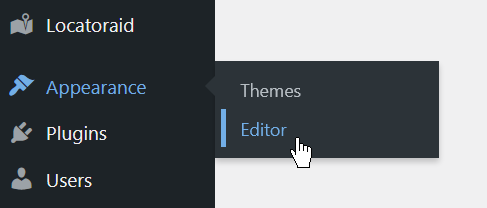
To add this widget block to your site, click Appearance, Editor in your WordPress admin area.
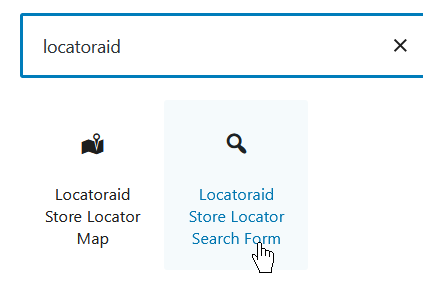
In the Editor, click Template Parts, then Footer. Then using the same Block Inserter, add the Locatoraid Store Locator Search Form.
You can also adjust some options of the store locator widget block.
Target Page
If you have several locator pages made with the block or the shortcode, you can which which page this widget will be redirecting the customer to display their results.
Title
It defines the label for the search text input field, for example Enter address or zip code.
Button Text
This is the label for the search form submit button, for example Click here to search.
About Locatoraid
Lightweight, easy to use WordPress store locator plugin to help your customers find your stores, dealers, hotels, restaurants, ATMs, products, or any other types of locations. Get started with the free Locatoraid version and enjoy the beautiful add-ons of Locatoraid Pro.